Email Setup for Apple Mac Mail
- Knowledge Base
- User Guide
- Videos
1) Open the Mail App on your MacBook.
2) Go to the "Mail" menu (left of "File" in the top-left menu bar) and select "Add Account..."
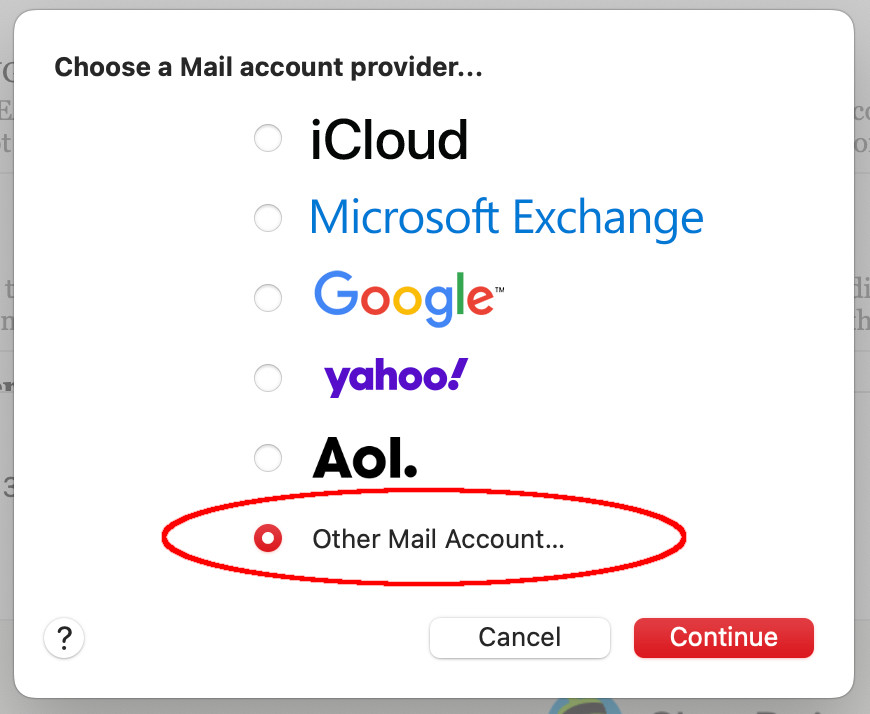
3) Choose "Other Mail Account..." and press Continue:
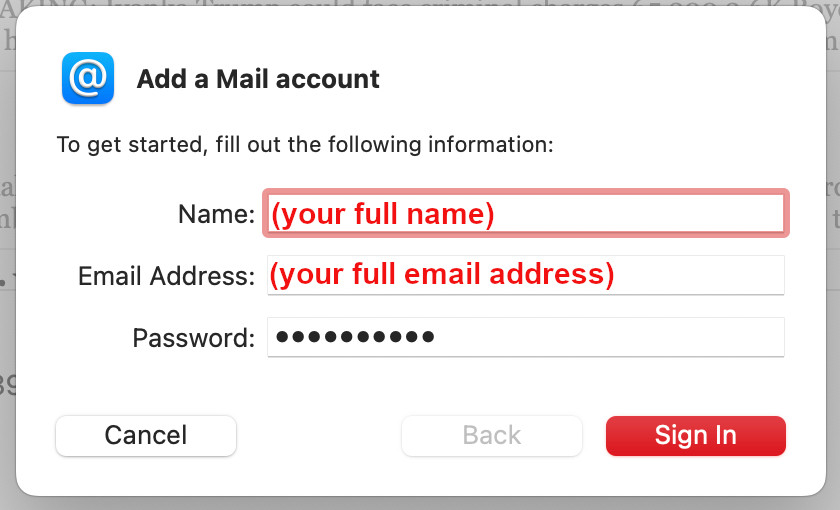
4) Type your full name (as you want it to appear on emails you send), your FULL email address, and your email password, and press "Sign In".
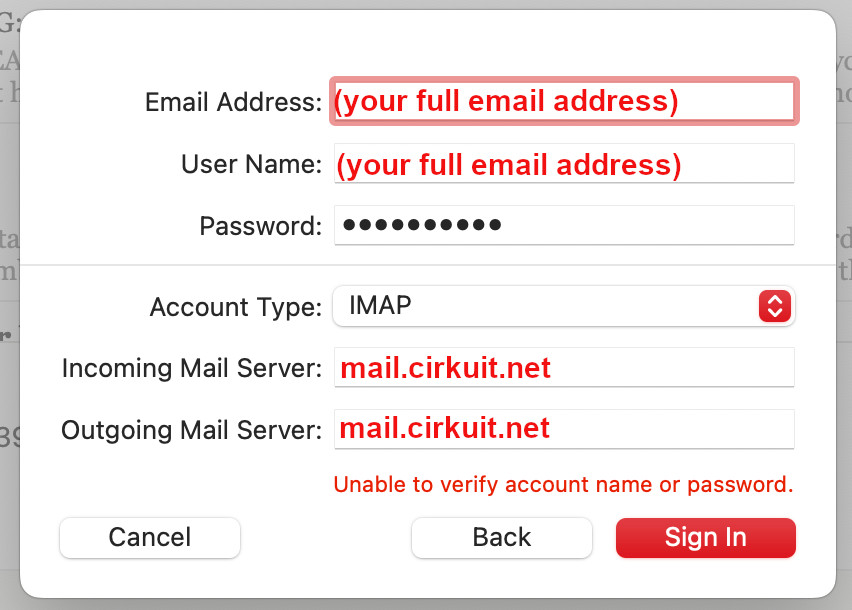
5) The Mail App will try to auto-detect the mail server settings and may fail with the message "Unable to verify account name or password."
Manually type the "Incoming Mail Server" and "Outgoing Mail Server" to both be:
mail.cirkuit.net
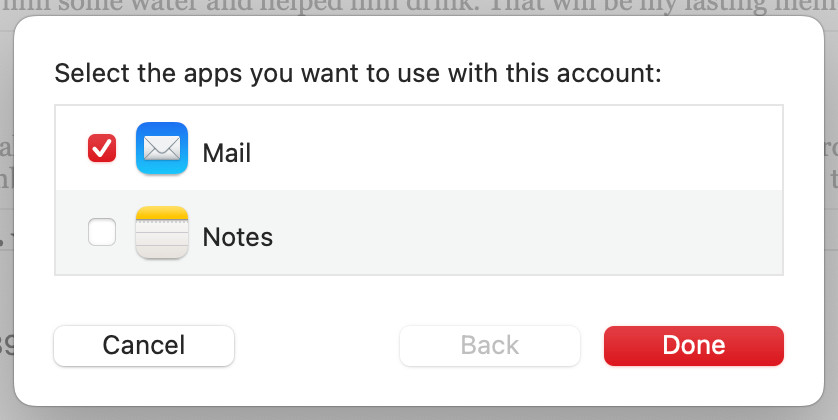
4) Select to use "Mail" for this account:
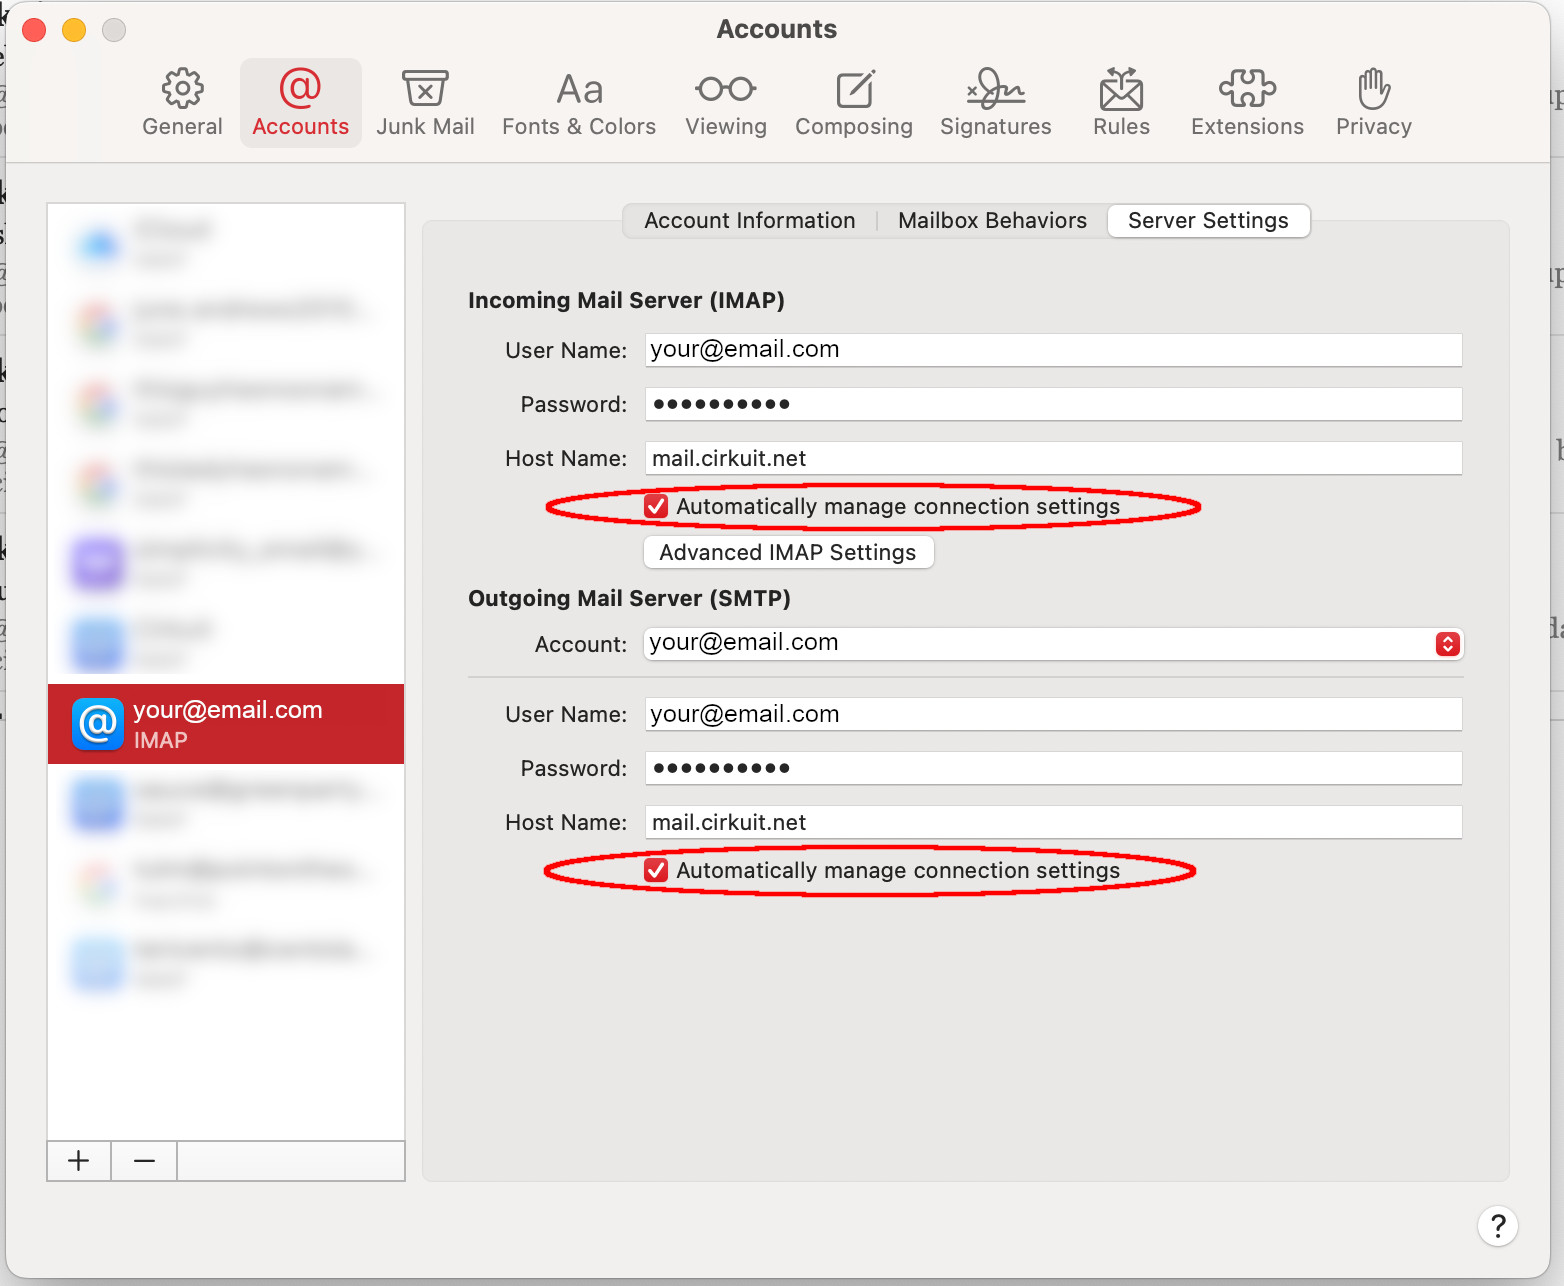
5) Go to the "Mail" menu again (left of "File" in the top-left menu bar) and select "Settings..."
A new window will appear. Select "Accounts" in this window and select your new account to view the server settings.
Uncheck the options "Automatically manage connection settings" for both the Incoming and Outgoing Mail Server:
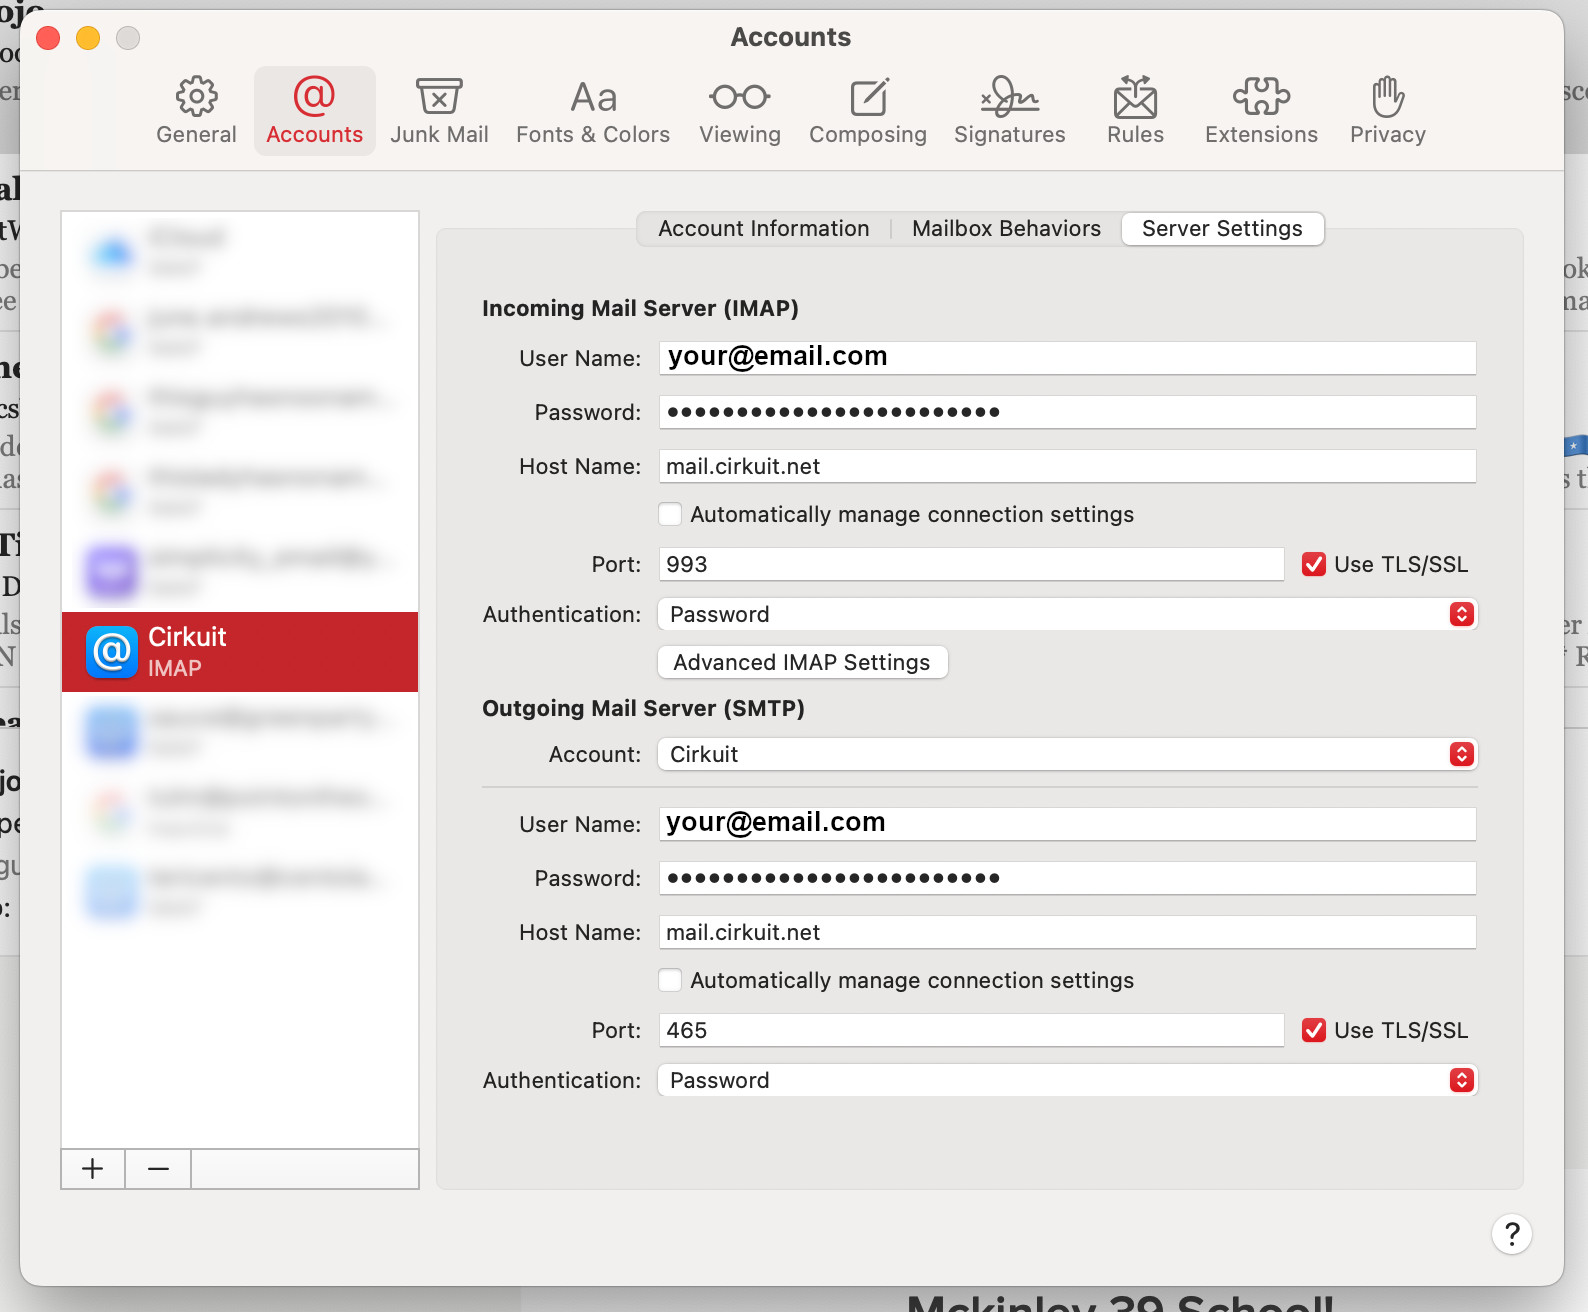
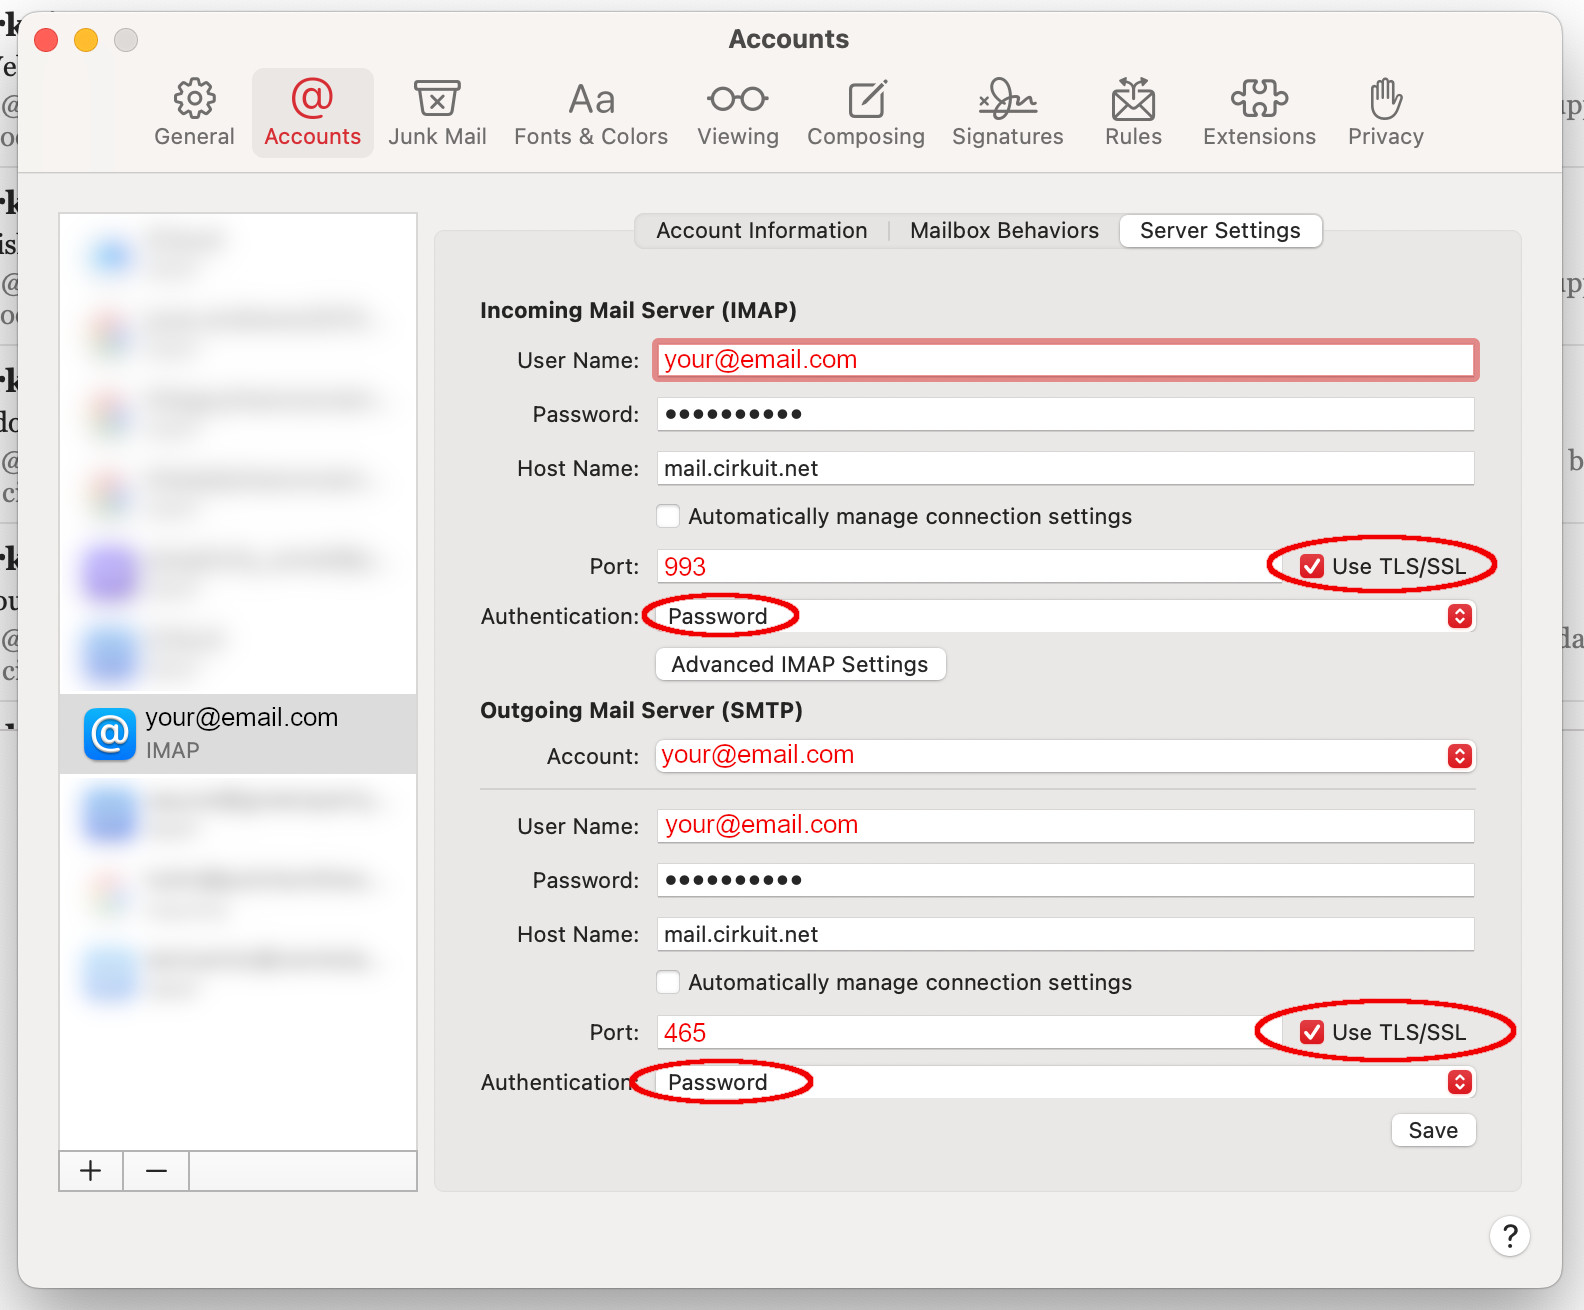
6) Verify and set all of the following servers settings. Press "Save" when finished:
Incoming Mail Server (IMAP)
User Name: (Your full email address)
Password: (Your email password)
Host Name: mail.cirkuit.net
Automatically manage connection settings: NOT CHECKED
Port: 993
Use TLS/SSL: CHECKED
Authentication: Password
Outgoing Mail Server (SMTP)
User Name: (Your full email address)
Password: (Your email password)
Host Name: mail.cirkuit.net
Automatically manage connection settings: NOT CHECKED
Port: 465
Use TLS/SSL: CHECKED
Authentication: Password
You have successfully added your Cirkuit email account to your Apple Mac Mail.
Your final settings should appear as follows (with "[email protected]" replaced with your full email address):