UPS Shipping Merchant
- Knowledge Base
- User Guide
- Videos
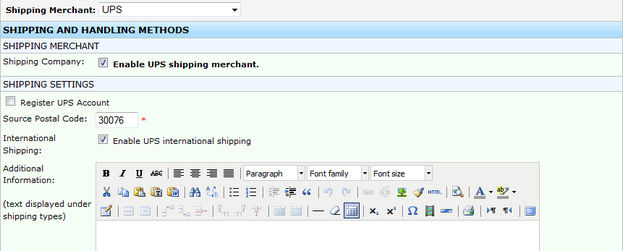
Enable UPS shipping merchant: Enable this option to use UPS as your primary shipping merchant.
Register UPS Account: If you need to sign up for a new UPS account or register your current account in to SEO-Cart, check the Register UPS Account checkbox and click the UPS Online Tools Registration Wizard link.
UPS Username: Enter your UPS username. If you do not have a UPS username, click on the "Sign up for a new UPS account" link or visit ups.com and register your new account.
UPS Password: Enter your UPS password. If you do not have a UPS password, click on the "Sign up for a new UPS account" link or visit ups.com and register your new account.
UPS Access Key: Enter your UPS access key. If you do not have a UPS account to enter your access key, click on the "Sign up for a new UPS account" link. If you do have a UPS account, go to ups.com and login to your account. Once logged in, go to Support->Technology Support->UPS Developer Kit and Request an access key.
UPS Account Number: Enter your UPS account number. If you do not have a UPS account number, click on the "Sign up for a new UPS account" link or visit ups.com and register your new account.
Source Postal Code: Enter the postal code that you will be sending shipments from. This field is used to help calculate shipping rates for your customers.
Enable UPS international shipping: Check the International Shipping checkbox if you would like to allow UPS international shipments to be made on your website.
Saturday Delivery: Check the Enable Saturday Delivery checkbox if you would like to offer UPS Saturday Delivery shipments to your customers.
Time In Transit: Check the Enable Time In Transit checkout if you would like to display to your customers the estimated shipping date that they should expect to have their package if they decide to place their order. Once enabled, you can specify the latest maximum time a package will be shipped when an order is made (excludes weekends and holidays).
Print Shipping Label: Check the Print Shipping Label checkbox if you would like to be able to generate and print UPS shipping labels directly within SEO-Cart. Once a shipping label is created, the tracking number for the order can be sent to the customer so that he/she can track their package. IMPORTANT NOTE: You must be certified by UPS to use this feature. To get certified, enable the Print Shipping Label checkbox under your UPS Settings and click the "UPS Ship API Certification Suite" link and follow the instructions on the page.
Label Format: Choose the label format you would like to print for your labels. Any International labels that are printed will automatically print as GIF format because of the customs forms.
Declared Value: Check the Enable Declared Value checkbox if you would like to automatically include an insurance value for your products that you ship to your customers. The insurance value will automatically be set as the product sale price.
Delivery Confirmation: Check the Enable Delivery Confirmation checkbox to enable signature confirmation options for your products that you ship to your customers.
Customer Type: Select your customer type, Residential or Commercial. If you would like your customers to choose if their shipping destination is Residential or Commercial then set your customer type to 'Allow Customer to Select'. If you would like to have UPS determine the customer type, enable the 'Allow UPS to determine' option. If allowing UPS to determine the customer type, then you must obtain API access by clicking the UPS Street Level Address Validation Certification Suite link and continuing.
UPS Account Type: Select your account type that you wish to have with UPS, Daily Pickup, Occasional Pickup, or Suggested Retail Rate (UPS Store).
Exclude Shipping: Enable this option if you would like to exclude items from automated shipping calculation through UPS. If turned on, you will see a checkbox to disable a product from shipping calculation when modifying or creating a new product.
Exclude shipping calculation text: Enter text displayed to the customer on checkout and order email receipt if they purchase a product in their shopping cart that is excluded from shipping calculation. Typically, you will let the customer know you will contact them after their order is placed with additional shipping charges.
Quantity Exclude Shipping: Enable this option if you would like to exclude items from automated shipping calculation through UPS if a specified quantity of an item is purchased. If turned on, you will see an option to enable quantity exclude shipping when modifying or creating a new product.
Quantity exclude shipping calculation text: Enter text displayed to the customer if quantity exclude shipping is turned on and they purchase a product where the quantity exclude shipping conditions are met.
Allow Errors: Enable this option if you would like the customer to still be able to place an order even if the shipping merchant returns an error on the rate request response. If enabled, you can display the "Error exception text" to the customer as long as no valid rates are returned. Errors include but are not limited to 'Package weight exceeds limit', 'Number of packages exceeds limit','Invalid postal code', etc.
Error exception text: Enter text displayed to the customer during checkout if 'Allow Errors' is turned on and the shipping merchant returns a calculation error and no rates are returned from other shipping merchants.